How To Install Windows On A Mac With Boot Camp

How To Install Windows On A Mac With Boot Camp: A Comprehensive Guide
Prologue
Installing Windows on a Mac can be a daunting task, especially if you’re not familiar with the process. Fortunately, Apple has made the process easier with its Boot Camp utility, which allows you to install and run the Windows operating system on your Mac. In this article, we’ll walk you through the process of installing Windows on a Mac using Boot Camp, as well as provide you with some helpful tips and tricks for getting the most out of the experience.
Overview of Boot Camp
Apple’s Boot Camp utility allows you to install and run the Windows operating system on your Mac. It divides your hard drive into two partitions, one for Mac OS X and one for Windows, and allows you to switch between the two operating systems at will. It also provides drivers for Windows, so you can use all of your Mac’s hardware, including the trackpad, keyboard, and other peripherals.
Requirements for Installing Windows
Before you can install Windows on your Mac, you’ll need to make sure that your Mac meets the minimum requirements for Windows. The minimum requirements are:
- A Mac with an Intel processor
- At least 4 GB of RAM
- At least 60 GB of free hard disk space
- A copy of the Windows installation disc or ISO file
Preparing Your Mac for Windows
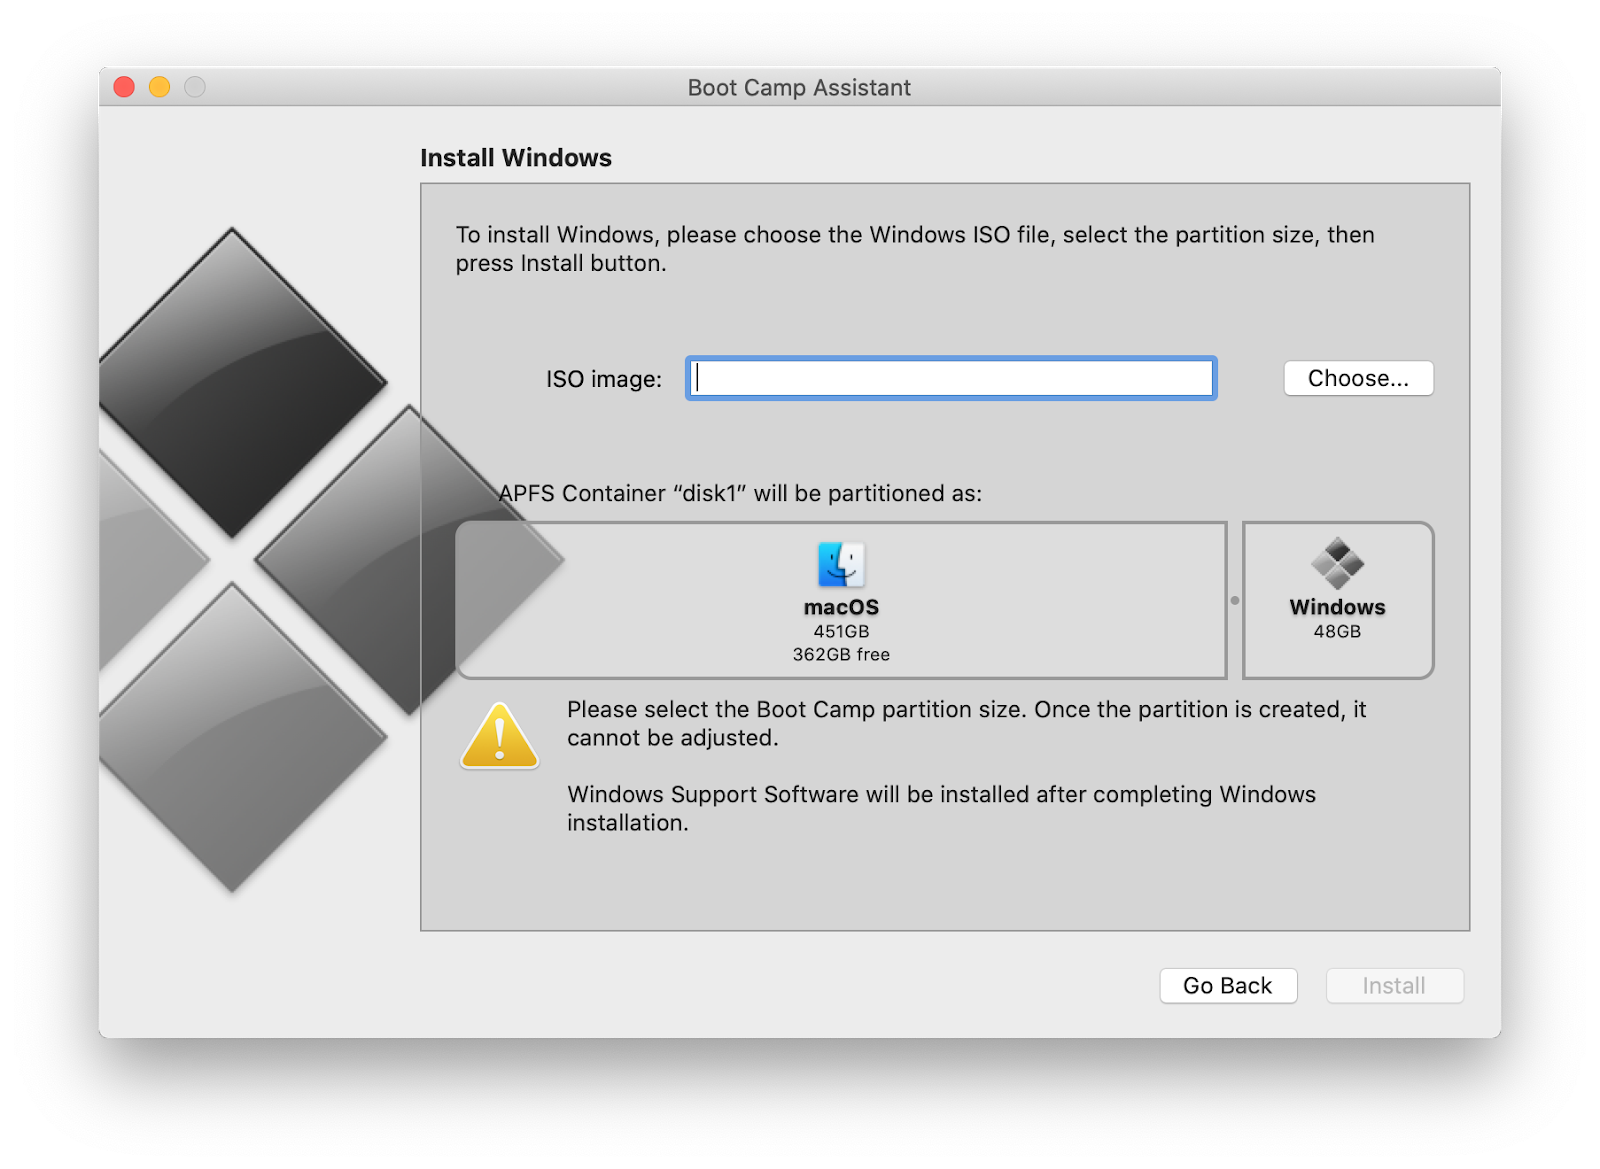
Once you’ve confirmed that your Mac meets the minimum requirements for Windows, you’ll need to prepare your Mac for the installation process. This includes creating a partition on your hard drive, downloading the necessary drivers, and creating a bootable Windows installation disc or USB drive.
Creating a Partition
The first step in preparing your Mac for Windows is to create a partition on your hard drive. This will allow you to install Windows on a separate partition, so you can switch between Mac OS X and Windows at will. To create a partition, you can use Apple’s built-in Disk Utility program.
Downloading Drivers
Once you’ve created a partition, you’ll need to download the necessary drivers for Windows. Apple provides a Boot Camp utility that will automatically download and install the necessary drivers for Windows.
Creating a Bootable Windows Installation Disc or USB Drive
The last step in preparing your Mac for Windows is to create a bootable Windows installation disc or USB drive. This will allow you to boot up your Mac and install Windows directly from the disc or USB drive. To create a bootable Windows installation disc or USB drive, you can use Apple’s Boot Camp utility.
Installing Windows on Your Mac
Once you’ve prepared your Mac for Windows, you can begin the installation process. The installation process is fairly straightforward and should only take a few minutes.
Step 1: Boot Up Your Mac
The first step in the installation process is to boot up your Mac. To do this, insert the Windows installation disc or USB drive into your Mac and restart it. When your Mac starts up, it should display a menu that allows you to select the Windows installation disc or USB drive. Select the Windows installation disc or USB drive and press enter.
Step 2: Install Windows
Once your Mac has booted up, you’ll be prompted to install Windows. Follow the on-screen instructions to complete the installation process. Once Windows is installed, you can begin using it immediately.
Step 3: Install Drivers
Once Windows is installed, you’ll need to install the necessary drivers. This will allow you to use all of your Mac’s hardware, including the trackpad, keyboard, and other peripherals. To install the drivers, use Apple’s Boot Camp utility.
Conclusion
Installing Windows on a Mac can be a daunting task, but it doesn’t have to be. With Apple’s Boot Camp utility, you can easily install and run the Windows operating system on your Mac. In this article, we’ve provided you with an overview of the installation process and some helpful tips for getting the most out of the experience. With this guide, you’ll be able to install Windows on your Mac quickly and easily.

Image :
macworld.com
Additional Insight Video
If you're wanting to know more about the subject discussed in this piece, I advise watching the attached video. In this recording, you'll obtain further perspectives and information on the matter, as well as graphic illustrations of some of the main ideas and concepts covered in the piece. You'll also have the opportunity to hear from professionals in the area and engage with like-minded viewers who are enthusiastic in the same topic. Whether you're hoping to enhance your understanding of the subject or simply wish to explore it further, this footage is a valuable resource for anyone curious in acquiring more information. So, if you want to gain a more comprehensive understanding of the topic, be sure to check out the attached video. It's sure to give you the perspective and knowledge you want to expand your knowledge and expertise.
To sum up, About this topic How To Install Windows On A Mac With Boot Camp our hope is that you will find the information presented helpful and informative. We understand that our environment is constantly changing, and remaining updated with the latest updates could be tough. That's why we make it our mission to provide you with the most articles out there. We value your feedback is vital to us, thus please feel free to leave comments in the comments section. Thank you for your readership and invite you to check out other pieces on our website to widen your knowledge more. Thanks for being a part of our community!

Post a Comment for "How To Install Windows On A Mac With Boot Camp"